
Raymond Mill Installation Guide with Step-by-Step Diagrams
We provide a wide range of mills — including Raymond mill, trapezoidal mill, vertical mill, ultrafine mill, and ball mill, obtained ISO9001 international quality certification, EU CE certification, and Customs Union CU-TR certification. Suitable for processing minerals such as limestone, phosphate, quicklime, kaolin, talc, barite, bentonite, calcium carbonate, dolomite, coal, gypsum, clay, carbon black, slag, cement raw materials, cement clinker, and more.
The discharge range of these mills can be adjusted to meet specific processing needs, typically from 80-400 mesh, 600-3250 mesh, and can achieve the finest particle size of up to 6000 mesh(D50).
If you are looking for a reliable grinding solution to turn stone or minerals into fine powder, please feel free to contact our online customer service.
Raymond Mill Installation Guide with Step-by-Step Diagrams
Installing a Raymond Mill correctly is crucial for achieving optimal performance, longevity, and safety in your powder processing operations. This guide provides a professional, step-by-step approach to ensure a smooth and efficient installation process. Proper installation not only maximizes the mill’s efficiency but also minimizes future maintenance issues and operational downtime.
Pre-Installation Planning and Site Preparation
Before the mill arrives, thorough site preparation is essential. The foundation must be designed to withstand the total dynamic load of the equipment, including the mill, motor, and classifier. It should be constructed from high-grade reinforced concrete and allowed to cure completely—typically for at least 15-28 days—to achieve its full strength. The foundation must be level and stable to prevent vibrations that could damage the mill’s components. Ensure the installation site has adequate space for operation, maintenance, and future component replacement. All necessary tools, including heavy-duty cranes, hoists, and precision leveling instruments, should be on hand and in good working condition.
Step-by-Step Installation Procedure
Step 1: Foundation and Base Frame Installation
Begin by carefully placing the base frame onto the prepared foundation. Use high-strength anchor bolts to secure it, but do not fully tighten them initially. Employ a precision level to ensure the frame is perfectly horizontal. Any misalignment at this stage can cause significant operational issues later. Once level, grout the base frame and tighten the anchor bolts to the manufacturer’s specified torque.
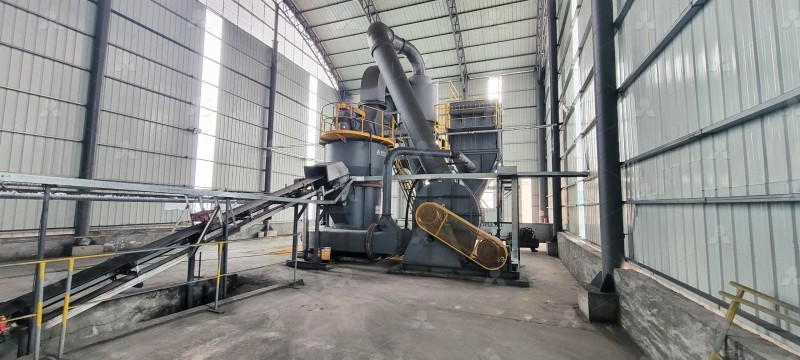
Step 2: Assembling the Main Mill Body
With the base secure, proceed to install the main mill body. This includes mounting the grinding roller assembly and the grinding ring. Carefully lift these heavy components into place using a crane, ensuring they are aligned according to the technical drawings. Connect the central shaft and ensure all fasteners are securely tightened. Pay close attention to the clearances between the rollers and the ring, as specified in the manual.
Step 3: Installing the Classifier and Drive System
The classifier, responsible for controlling product fineness, must be installed next. Align it precisely with the main mill outlet. Following this, install the main drive motor and reducer. Ensure the motor shaft is perfectly aligned with the mill’s input shaft to prevent premature wear and vibration. Use laser alignment tools for the highest accuracy. Connect the V-belts or couplings as per the design, ensuring proper tension.
Step 4: Connecting Auxiliary Systems
Install the feeder, which will supply raw material at a consistent rate. Connect the piping for the cyclone collector and baghouse dust collector to ensure a clean and efficient operation. Finally, wire the electrical control cabinet, connecting all motors, sensors, and safety interlocks according to the electrical schematic diagram. Double-check all electrical connections for safety and compliance with local codes.
Post-Installation Commissioning and Testing
After mechanical and electrical installation is complete, a rigorous commissioning process begins. First, run the mill without any material (an air test) to check for unusual vibrations or noises. Inspect the rotation direction of the motor and fan. Then, conduct a test run with a small amount of soft, non-abrasive material. Gradually increase the feed rate while monitoring the amperage of the main motor to avoid overloading. Check the final product fineness and adjust the classifier speed accordingly. A successful test run confirms a correct installation.
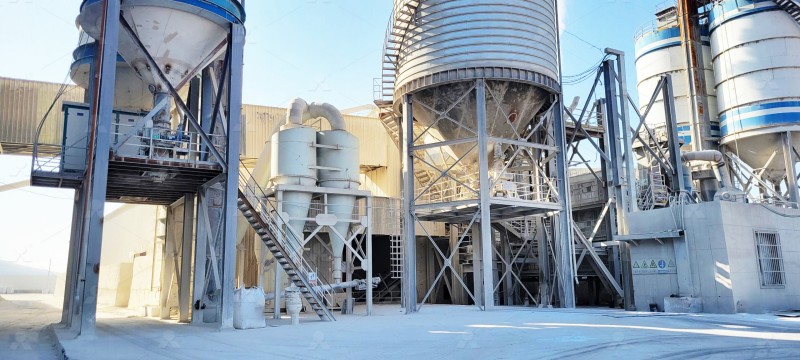
Choosing the Right Mill for Your Application
While the classic Raymond Mill is a robust and cost-effective solution for coarse to medium-fine grinding, many modern applications demand higher fineness and efficiency. For operations requiring ultra-fine powder between 325 and 2500 meshes, we highly recommend our MW Ultrafine Grinding Mill. It is engineered for customers needing to make ultra-fine powder and is equipped with an efficient pulse dust collector and muffler, ensuring minimal environmental impact. Its innovative design, which eliminates rolling bearings and screws in the grinding chamber, significantly enhances operational reliability and reduces maintenance worries.
For another excellent option, consider the LUM Ultrafine Vertical Grinding Mill. It integrates ultrafine powder grinding, grading, and transporting with higher yielding rates and better energy efficiency, making it a superior choice for advanced powder processing needs.
Frequently Asked Questions (FAQ)
What is the most critical step during Raymond Mill installation?
The most critical step is ensuring a perfectly level and robust foundation. An unstable foundation is the primary cause of excessive vibration, premature wear, and component failure.
How long should the initial test run be?
An initial test run should last for at least 4-8 hours. This duration is sufficient to identify any issues with alignment, lubrication, or system balance under a controlled load.
Can I install the mill without a crane?
It is not advisable. The main components, like the base frame and grinding roller assembly, are extremely heavy. Using improper lifting equipment poses a severe safety risk and can easily damage the mill.
What is a common mistake to avoid during electrical wiring?
A common mistake is incorrect motor phasing, which causes the motor to run in reverse. Always verify the rotation direction of the fan and the main motor immediately after the first power-on.
When should I consider upgrading to an MW Ultrafine Grinding Mill?
Upgrade if your production requires a finer product (exceeding 600 mesh), higher capacity, or more environmentally friendly operation with lower noise and dust emissions. The MW Mill is designed specifically for these advanced requirements.